Let's Encrypt - DNS Validation for NSX Advanced Load Balancer
Replacing self-signed certificates on appliances is a lot easier these days. This is to remind myself how I did it for NSX Advanced Load Balancer using Let's Encrypt with DNS validation.
In the lab here I am using NSX Advanced Load Balancer 21.1.1.
Install & Run Certbot
My NSX Advanced Load Balancer controller in the lab isn't internet accesible, so I need to use Let's Encrypt's DNS validation.
If you don't already have certbot install, install it with:
1sudo snap install certbot  # version 1.23.0, or
2sudo apt  install certbot  # version 0.40.0-1ubuntu0.1
Note the version difference. Initially I went with the older version, but later realised only the newer version does ECDSA (Eliptic Curve) certs.
1sudo snap install certbot --classic
Using DNS validation, you'll need to control the DNS entry of a domain. When creating a cert, certbot will ask you to create a TXT record, which it will then validate.
Run certbot:
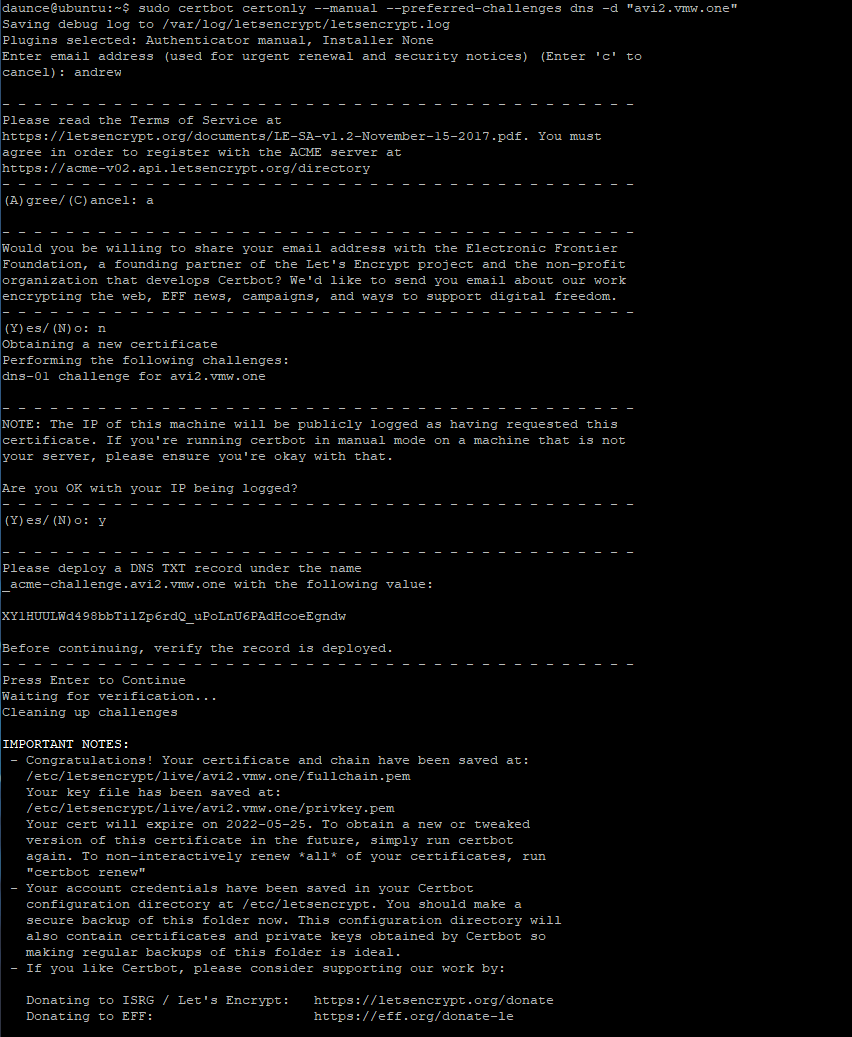
1sudo certbot certonly --manual --preferred-challenges dns -d "avi2.vmw.one"
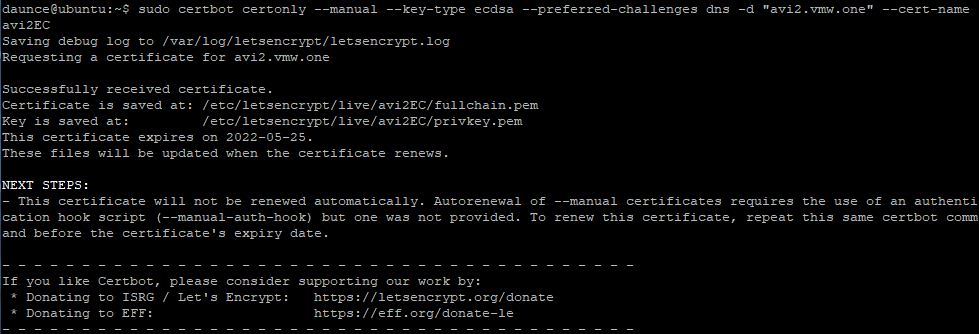
This created an RSA certificate, but we should do ECDSA as well.
1sudo certbot certonly --manual --key-type ecdsa --preferred-challenges dns -d "avi2.vmw.one" --cert-name avi2.vmw.one-ECDSA
For whatever reason, it needs sudo, so list and cat fullchain.pem & privkey.pem
 1daunce@ubuntu:~$ sudo ls -1 /etc/letsencrypt/live/avi2.vmw.one
 2cert.pem
 3chain.pem
 4fullchain.pem
 5privkey.pem
 6README
 7
 8daunce@ubuntu:~$ sudo cat /etc/letsencrypt/live/avi2.vmw.one/fullchain.pem
 9-----BEGIN CERTIFICATE-----
10[ output omitted ]
11-----END CERTIFICATE-----
12daunce@ubuntu:~$ sudo cat /etc/letsencrypt/live/avi2.vmw.one/privkey.pem
13-----BEGIN CERTIFICATE-----
14[ output omitted ]
15-----END CERTIFICATE-----
Import Certificates
Now login to the NSX Advanced Load Balancer UI, and go to Templates / Security / SSL/TLS Certificates. Click Create - Controller.
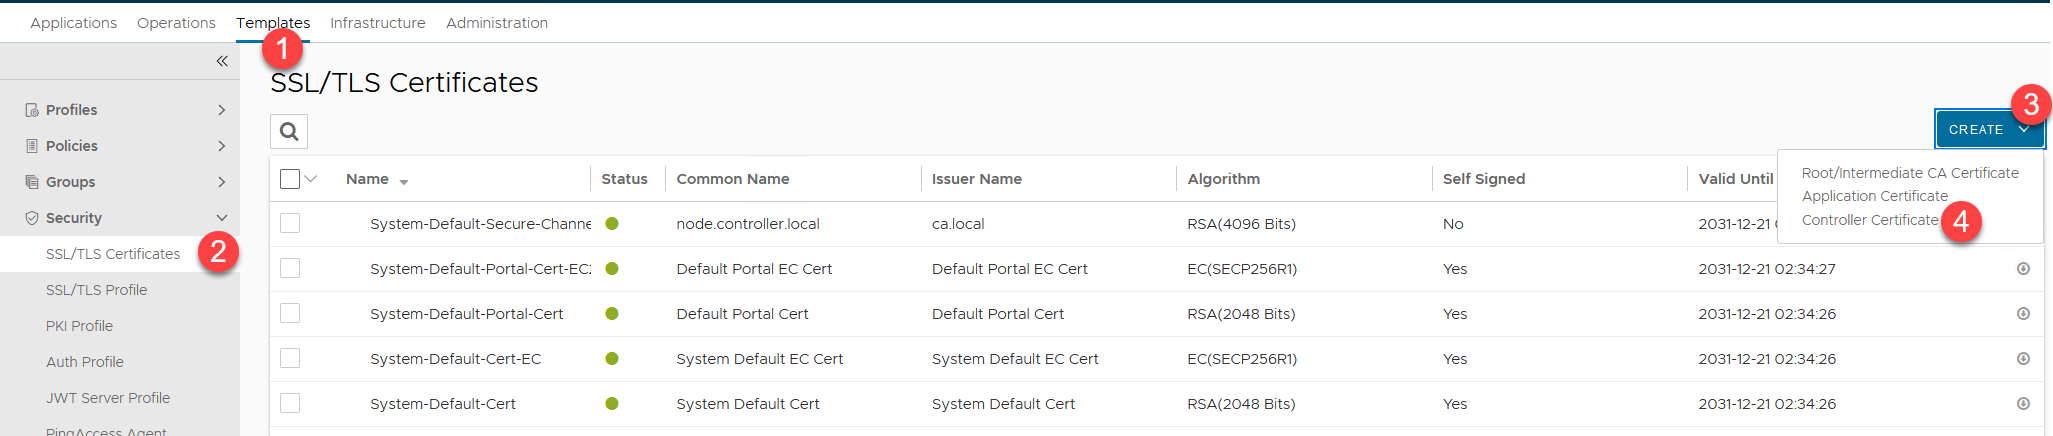
Type in a name, change the Type to Import, and copy / paste the contents of the fullchain.pem file. Then paste the contents of the privkey.pem file.
Finally, click Validate, and that will enable the Save button.
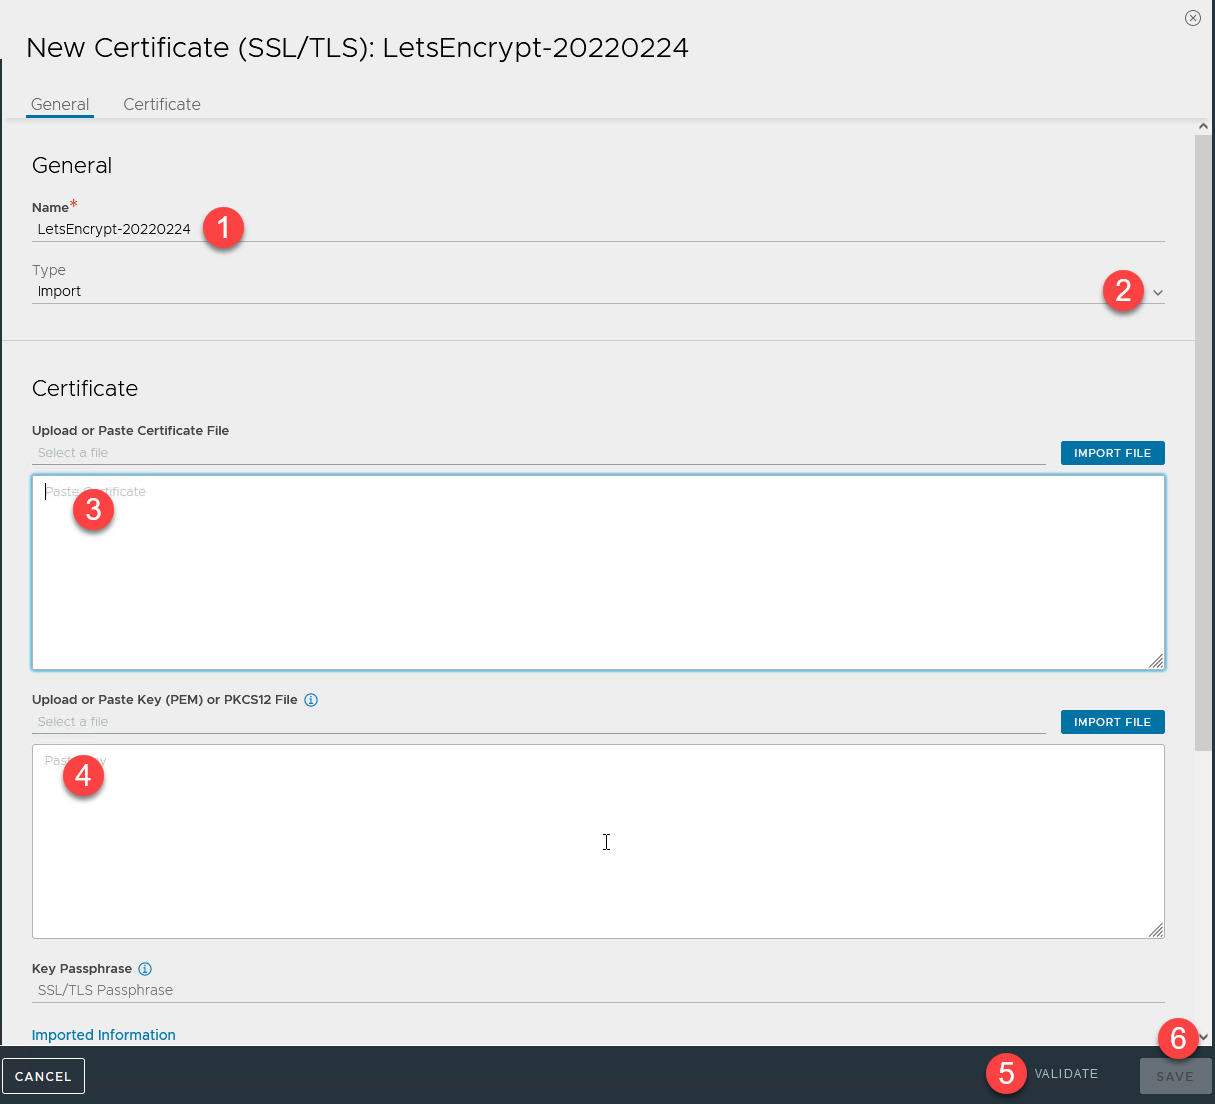
Run through the same thing again for the ECDSA certificate. Just add "EC" to the previous certificate name that you entered.
Enable the certificates
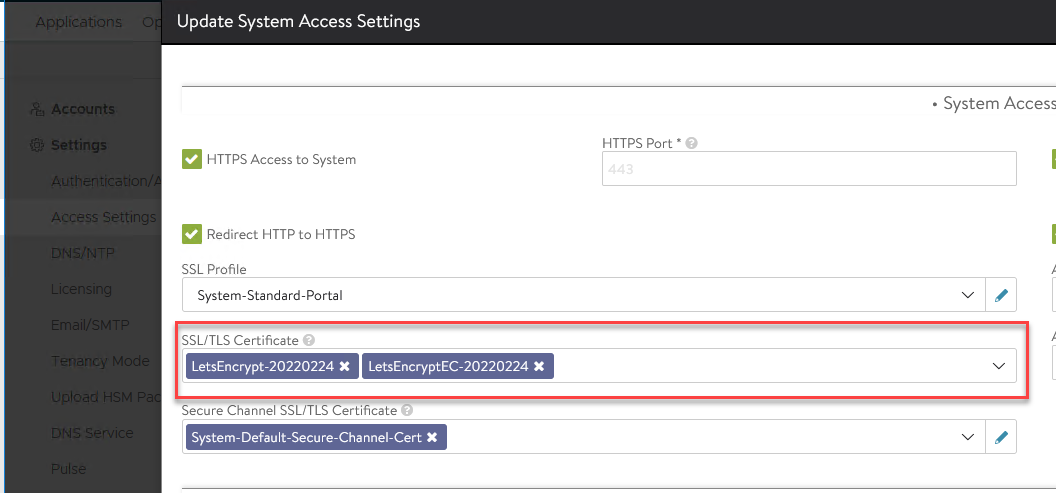
Now we need to tell the controller to use these new certificates. Go to Administration / Settings / Access Settings, and click the pencil icon.
Under SSL/TLS Certificate, you can only have a maximum of 2 certificates, so remove both certificates, then you can use the drop down menu to select the new certificates you just created. Click Save.
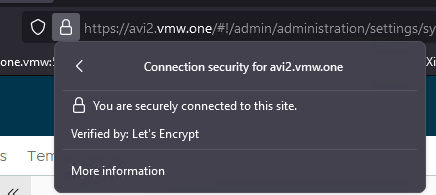
Logout, and back in again, and you'll hopefully see the verified icon in your browser.
Just remember Let's Encrypt certificates expire after 3 months.